Monday, June 9, 2014

A recipe and an update.

Just felt like sharing a recipe here today.  In addition, an update.  My quilt top is almost finished and I can start soon on the quilting of it.  I'll post a picture when I get the top finished.  It's looking pretty good.  Today has been an interesting day.  Just looking at Facebook today and seeing some recipes and feel like posting a  sumptuous restaurant quality recipe. This one is not one of my dollar a serving recipes, but it is so good and tastes like the ones you spend twenty dollars and up to eat in a fancy restaurant.  However, I can make it for the whole family for what it would cost us for one to order it in the restaurant.  This is my own creation. 

Angel Hair Pasta with Lobster and Scallops in a Butter Garlic Sauce


1 stick of butter
3 cloves of garlic (I also used minced garlic)
1 pkg fresh spinach
3 T Lime juice
1/4 c cornstarch
1 pound of large scallops
1 large lobster tail
1 pound of angel hair pasta cooked
1/2 cup grated parmesan cheese (I like the largely grated pieces)

Directions:

Coat scallops in cornstarch. Melt 1/2 of butter in a skillet and add garlic.  Place scallops around the outside edge of the skillet.  Cut lobster tail into bite sized pieces. Place lobster meat in the center of the skillet.  Cook scallops until golden brown on all size and lobster until pink and opaque.  When fully cooked drizzle lime juice over all.  Remove to a plate.  Add remaining butter to skillet and add spinach when butter is melted.  Cook spinach until wilted.  Serve by placing angel hair pasta on plate, place spinach on top and top with scallops and lobster meat.  Sprinkle parmesan cheese on top. 

It's just that simple.  And it tastes like the expensive restaurant meal.  I sometimes substitute shrimp if I'm trying to save money or I don't have scallops and lobster, but it's really only truly decadant with the scallops and lobster.  Of course, it really needs a good cheesecake to go with it, but that's another post.

Wednesday, May 28, 2014

Quilting my latest project

A few years ago, I took a beginning quilting class.  While I had sewn for years, I had never really tried the quilting thing.  When I took the class, the teacher wanted us to hand piece the first block and then she said if we wanted to we could machine stitch the remaining blocks.  I found that I enjoyed hand piecing the blocks and finished the entire project hand piecing it.  I got to the quilting stage and began quilting it, but did not finish it. Life got busy here and after the fire I have been unable to locate the project. I still have hope that I might come across it when I finally get things finished up in my craft room. 

A couple of weeks ago, I had a friend call me and ask if I would like to go check out some quilt shops.  A couple of them I had been to before, but we also checked out a new one.  As I love the feel and color of the fabrics of course I was game to go.  We spent the day going to these shops and stopped for lunch along the way.  It was a great day.  My friend even gave me a little "spending" money to get something to work on (of course, I probably have enough fabric in my "stash" to make numerous quilts). I chose some materials and we copied a pattern out of book she had for a small wall hanging. I began piecing the blocks and again find that I enjoy the hand piecing.  We decided that over the summer we would get together from time to time on rainy days and work on our projects.  She pieces hers on the machine, so hers go together much quicker.  Yesterday we got together at a local quilt shop and worked on our projects.  I had pieces the blocks that mine needed pieced and was able to cut out the remaining blocks and triangles to begin putting together my rows.  I laid out my blocks and arranged them as I wanted them and pinned my rows together.  Last night I came home and while watching television, I put together two more rows. I'll take it along today and work on putting my rows together while I wait for a doctor's appointment for Jim.  It will give me something to work on while we wait.  I'll  be putting my final pictures here when I finish. The pattern that I chose to work with was Pink Patches Doll Quilt.  I mostly chose it because it was fairly simple.  And while I have years of experience sewing, quilting is still somewhat new to me. 

Of course since I am now looking at quilt projects I'm now looking at fabric in a whole new light.  I happened to be in the fabric section at Walmart and came across a fabric that just has to go in one of my next projects.  I couldn't just stop with the paisley print I found. I had to continue until I had enough pieces to be able to make another small quilt and had to match the colors in the paisley.  so, I have another project ready when this one finishes.  Yesterday while we were at the local quilt shop, I also saw a quilt on the wall that I would love to do for our bedroom.  So, I need to get the book with the pattern and start collecting fabric to make it.  I already have an idea what colors I will do it up in, but finding them will be lots of fun.  While I would love to make it up for our bed, I'm not sure I can aspire to making a King sized quilt yet. I think I need a few more that I can put on the walls first. 

I'll post when I have this project finished and what some of my upcoming projects will be. 

Later this week I will be doing a bulk cook prior to the beginning of my new classes starting.  I'm hoping to have enough meals in the freezer that it will make cooking during the next several weeks much easier.  I'm sure these classes will be at least as demanding as the previous ones have been.  I'll post what meals I end up with in the bulk cook.  These are mostly freezer casseroles and dinners to dump in the crock pot.  It is so much nicer to be able to just reach in the freezer and put it in the crockpot and go on about the day. 

Friday, May 23, 2014

May Cooking Class Ministry

Today was awesome.  I had four women come to my cooking class and we had a great time.  Today, I shared some foods that I've seen in the food pantries that people don't seem to want to take with them as they aren't sure what to do with it.  The foods I chose to highlight today were Kobacha squash, avocados, and turnips. I know that avocados make excellent guacamole, but not everyone likes guacamole, so I looked for another recipe to use with those.  I came across this recipe on my facebook page, and tried it and it was delicious.  It made avocados taste totally different. The blog that I borrowed it from is here

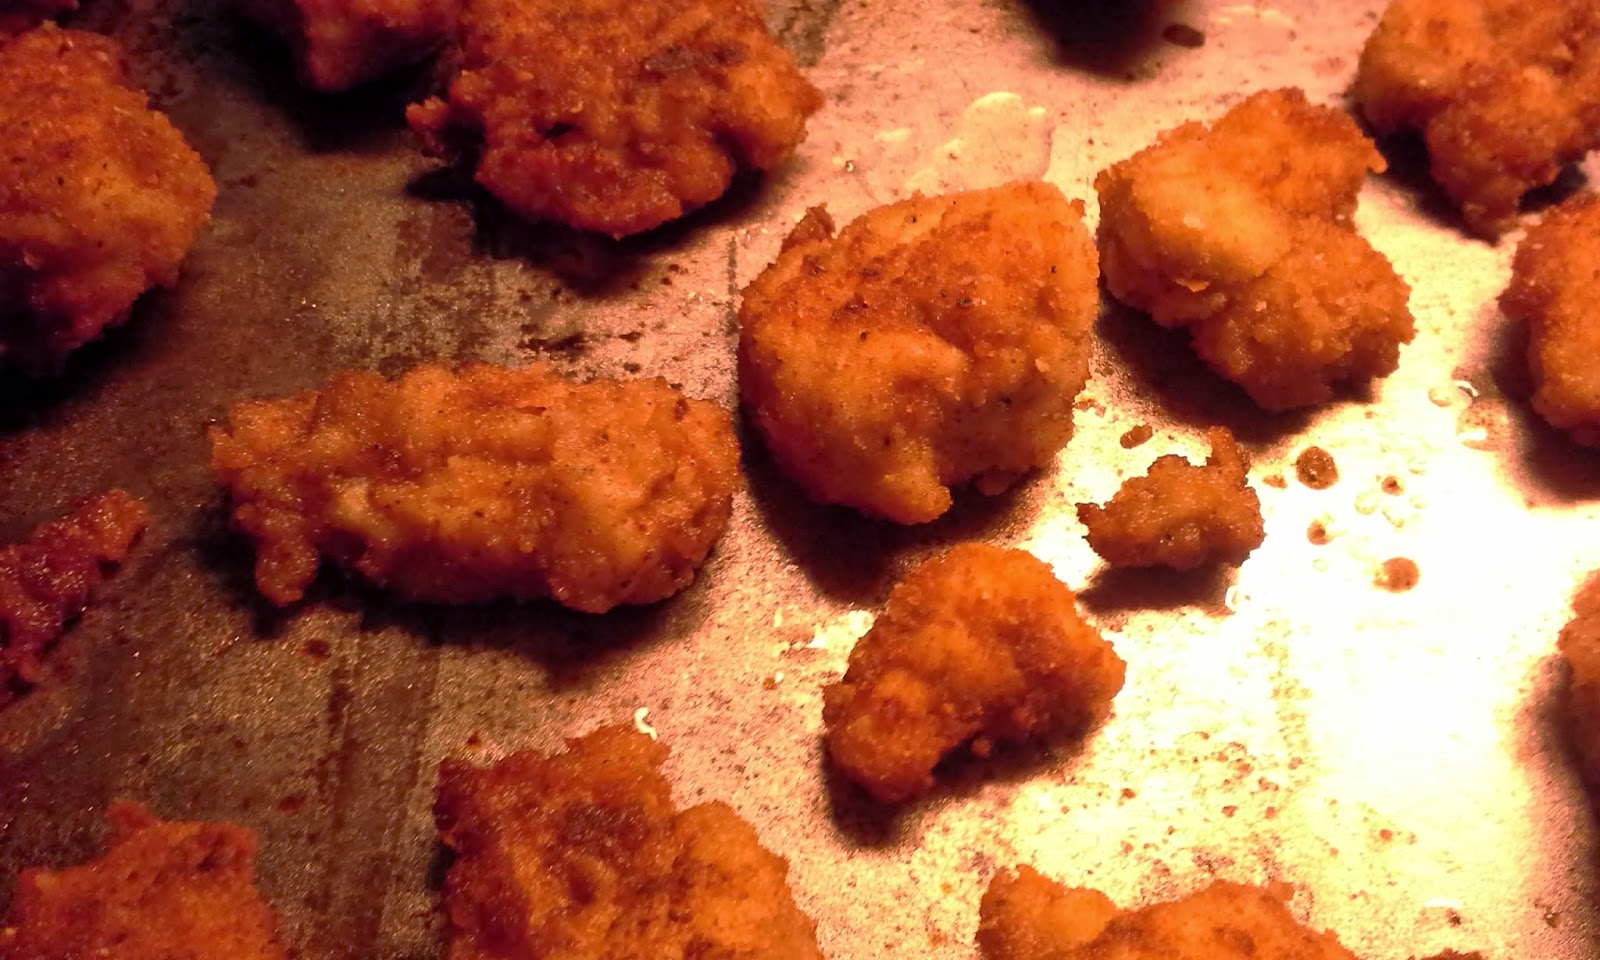
Here is the recipe.  I don't have all the pictures, but if you want a step by step guide and to see the pictures, feel free to click on the link above. The general consensus on these was that they would be great with a dip like ranch or French onion or even a cheese dip would be good.


Avocado Fries
Avocado Fries are baked, crunchy and delicious, and perfect as a side dish or snack.

Author: Stacey

Recipe type: side dish or snack

Ingredients

  • ¼ cup flour
  • 1 tsp kosher salt
  • 2 large eggs, beaten
  • 1¼ cups Italian Style bread crumbs
  • 2 firm-ripe medium avocados, pitted, peeled, and sliced into ½-in. wedges

  Instructions

  1. Preheat oven to 450
  2. Put flour in one bowl, eggs in another bowl, and panko in another bowl
  3. Coat avocado slices in the flour, then eggs, then panko
  4. Spread on a cooling rack that has been sprayed with non-stick spray
  5. Place cooling rack on a cookie sheet
  6. Spray the top of the wedges with olive oil or butter flavored cooking spray and sprinkle with salt
  7. Bake for about 20 minutes, or until they are golden brown
 
 
The second treat we had to sample was crispy turnip fries.  Those were also a hit.  I'm putting the recipe here, it came from allrecipes.com originally.  Disclaimer here, while they are very tasty. I wouldn't describe them as crispy.  They don't get crunchy like you think of fries being, but they are very good to eat.  Much better when served hot.


Crispy Turnip Fries
Ingredients
Original recipe makes 8 servings
  • 3 pounds turnips
  • 1 tablespoon vegetable oil
  • 1/3 cup grated Parmesan cheese
  • 1 teaspoon garlic salt
  • 1 teaspoon paprika
  • 1 teaspoon onion powder
 
Directions
  1. Preheat oven to 425 degrees F (220 degrees C). Line a baking sheet with a piece of aluminum foil and lightly grease.
  2. Peel the turnips, and cut into French fry-sized sticks, about 1/3 by 4 inches. Place into a large bowl, and toss with the vegetable oil to coat. Place the Parmesan cheese, garlic salt, paprika, onion powder in a resealable plastic bag, and shake to mix. Place the oiled turnips into the bag, and shake until evenly coated with the spices. Spread out onto the prepared baking sheet.
  3. Bake in preheated oven until the outside is crispy, and the inside is tender, about 20 minutes. Serve immediately.
The last recipe was roasted Kobacha squash.  The recipe calls for salt and pepper on it, but I love my squash with a little brown sugar on it, so I made it both ways.  Both were a hit as well.  This is another recipe that I found on another blog.  Here is the link to their blog.
She also has some beautiful pictures of the steps.  Feel free to go to her blog for the step by step pictures.
 
Roasted Kabocha squash
1 medium kabocha squash
2 tablespoons olive oil
salt
Freshly ground black pepper
Directions:
I preheated the oven to 400 F, rinsed the squash under running water, and dried it.
Like all winter squash, kabocha takes a sharp knife and a bit of brute force to cut up. I’ve found that the best way to attack it is to cut off the top and the bottom. I scooped out the seeds and cut the squash into thin wedges. Next, I tossed the squash with the olive oil and seasoned the slices with salt and pepper. I put the squash in a single layer on a foil-lined baking tray and popped it in the oven.
I roasted the squash for 30 minutes, flipping them over at the midpoint. The wedges are ready to eat when they’re slightly crunchy on the outside and fluffy and soft on the inside.
I also used brown sugar on some of them instead of the salt and pepper. I just sprinkled the brown sugar over the squash.  I found it baked a little bit better when I put it on a wire cooling rack on top of the cookie sheet.
 
Now I know you are wondering what was the recipe that we made that cost less than a dollar a serving.  The answer would be a chicken pot pie.  All made from scratch.  This recipe incorporated two other recipes to complete.  I started by boiling up the chicken with a few vegetables tossed in. 
 
The first recipe was a pie crust that doesn't require rolling out.  This pie crust can be used for any type of pie, and you can just put it together and press it into a pan.  This pie crust is pretty simple, but when measuring the flour and oil and water, if the flour is packed down in the measuring cup, you might need another tablespoon or so of water or oil. We made a double recipe because this recipe is for a single crust pie and we wanted a crust for the top of our pot pie.
 
Easy Pie Crust
Ingredients:
1 3/4 c. flour
1/2 t salt
1/2 c vegetable oil
2 T water
Directions
In a medium bowl, combine flour and salt. Stir in oil and water. Mix until combined. Then form it into a ball.  Spray your pie pan with nonstick cooking spray. Put the ball of dough in the middle of your pie dish.  And start pushing down on your ball of dough and begin spreading it towards the sides.  Do as best as you can to evenly pull it up the sides too so you can crimp it at the top edge.  You can even get in there with your knuckles if you need to.  Make sure you also press down into the bottom rim of the pan to spread out the dough so it's not too thick.  And then you can start to go around and crimp the top edges of the crust.  Remember this does not have to be perfect. It's a bottom only pie crust.  It's rustic and it's homemade. It should look that way.  Once it's ready, fill with your favorite filing and bake according to your pies's directions.  If you are using this crust in a recipe that calls for a pre-baked pie crust. Before baking, just make sure you use a fork and prick lots of little holes all over the crust.  This will keep the crust from puffing up too much while baking.
 
Just put this in your pan.  We used 8 inch round pans for our pies.
 
The next recipe is for the cream soup that is the sauce in our pot pies.  I love this recipe and I found it here.   I make this recipe up in bulk and freeze it to use in casseroles all the time.  I keep it on hand so that I have it whenever I need it.  For the class, I used leg quarters and put a sliced onion, a couple of carrots and a couple of stalks of celery in my stock pot and filled it up with water and cooked them up.  That is the broth I used to make the cream soup for the sauce.  Usually, when I make broth, I strain out those veggies, but since we were using those same veggies in our pot pies, I left them in the pot when I made up the soup.  However, I had a fair amount of the soup left over and decided to run it through the blender to blend up those veggies so as to not have chunks of veggies in my other casseroles when I use the remainder of the soup.  It turned out beautiful. 
 
 
  • 1 1/2 cups chicken broth
  • 1/2 teaspoon poultry seasoning
  • 1/4 teaspoon onion powder
  • 1/4 teaspoon garlic powder
  • 1/8 teaspoon black pepper
  • 1/4 teaspoon salt (or less; taste to test)
  • 1/4 teaspoon parsley
  • dash of paprika
  • 1 1/2 cups milk
  • 3/4 cup flour
  1. In medium-sized saucepan, boil chicken broth, 1/2 cup of the milk, and the seasonings for a minute or two (longer if using fresh onions or garlic).
  2. In a bowl, whisk together the remaining 1 cup of milk and flour. Add to boiling mixture and continue whisking briskly until mixture boils and thickens.
*This yields about two cans of condensed Cream of Chicken soup.
 

Chicken Pot Pie

4 Servings
2 cooked chicken leg quarters remove meat and cut into bite sized pieces
3-4 potatoes peeled and cubed
2-3 carrots peeled and cubed
1 small onion diced
1 stick of celery chopped fine
1 small can peas or 1/2 cup frozen peas
2 recipes pie crust
1/2 recipe of cream soup
I began by cooking the chicken leg quarters as stated above the cream soup.  I used that broth to make the cream soup. Once chicken is cooked, cool and remove from the bone. Place veggies into a pot and cover with water add salt to taste and cook until tender.  Put one recipe of pie crust into pan.  Drain cooked veggies and mix in chicken meat.  Mix in 1/2 recipe of cream soup and pour into pie crust.  Use remaining pie crust and either sprinkle on top or pat out small rounds of the pie crust between your hands and place on top.  Bake at 350 45-60 minutes until crust is golden brown.  (It would be best to place pan on a cookie sheet to avoid drips in your oven.)  I frequently make these up and freeze.  If cooking from frozen, add about 30 minutes to the cook time.  I put these in a 8 inch square baking pan and place in a ziplock freezer bag. Be sure you put the directions on the bag. 
 

The Plan for Next Month


Next month I'm going to take desserts in for taste testing.  I'm going to take in an avocado chocolate pudding, a garbanzo bean flourless chocolate cake and maybe the garbanzo bean chocolate chip cookie dough or some roasted garbanzo beans in a variety of flavors. Next month we are making homemade cleaners and talking about menu planning and shopping lists.


Thursday, April 24, 2014

April Cooking Class Ministry

Today was the first class in the new cooking class ministry at our church.  The plan for this class is to teach people to prepare meals that cost around $1.00 per serving. We started off small today with just one participant, but had a good time preparing a meal that she was able to take home to feed her family tonight. The recipe I chose for this class was extremely simple to prepare.  I usually make it and make two of them one to eat one and one to put in the freezer.  This recipe will make two casseroles that serve four people each.  This is a recipe that I made up on my own.  It's something that includes items that are given out at the food pantry.

This first recipe can be prepared for $1.22 per serving. Some of the other recipes are a little lower cost.

Penne pasta with Sausage


1 pound sausage or three Italian brats ( I like the turkey brats less fat.)
1 pound box penne pasta (can be made with any shaped pasta I also use bowtie and rotini)
2 cans diced tomatoes
1 cup shredded cheese of choice
 
Brown sausage  (if using brats remove from casing and brown). When sausage is browned add diced tomatoes and allow to simmer until some of the juice cooks off of it. Cook pasta al dente and drain water.  Combine pasta and sausage mixture and place in pan. I usually use a 9 inch square pan which will fit in a gallon ziplock bag. Divide pasta mixture between two pans.  Sprinkle cheese on top.  Place in ziplock freezer bags and freeze. When cooking from frozen, bake at 350 for 60 minutes. If you don't want to freeze it, bake until cheese is brown on top. I usually just toss it under the broiler for about 5 minutes and it comes out nice  If you refrigerate it will probably have to cook about 30 minutes or so heat through and brown the cheese on top.

This recipe had a cost of $1.22 per serving.


I also gave out two recipes for rice casseroles at the class. These are the recipes I shared today along with the one we made together. These recipes are also designed to make two pans with four servings a piece.
 

Sausage and Rice Casserole


1 can cream of mushroom soup
1 can cream of chicken soup (I make my own cream soup from this recipe and keep it frozen www.stacymakescents.com/homemade-cream-of-chicken-soup I just use one of these and add in some mushrooms. The recipe makes about 2 cans worth of soup)
4 cups rice cooked (I cook brown rice in my rice cooker and it makes four cups at a time.)
1 pound sausage
1 small onion diced
 
Brown sausage and mix with cooked rice, onion and soups. Put into pans and place in ziplock bags.  Bake at 350 for 60 minutes.  If not freezing and just baking it bake about 30 minutes.
 
This recipe comes out to $1.00 per serving with store bought canned soup.  Using the homemade version cuts the cost.


Chow Mein Noodle Casserole


1 can cream of chicken soup
1 can cream of mushroom soup (I use my homemade version from above)
1/4 cup soy sauce
4 cups rice cooked
1 pound ground beef
1 onion diced
1 cup chow mein noodles
 
Brown ground beef. Mix together the soups and the soy sauce.  Mix ground beef and rice with soup mixture and pour into pans. Place in ziplock bags. When ready to bake put 1/2 cup chow mein noodles on top. Bake at 350 for 60 minutes. If not freezing bake about 30 minutes.
 
Don't forget to label your ziplock bags with the name and directions for preparation. It will save you time later. I like to put some of these in the freezer and on days when I don't want to cook or don't have time, I only have to pull the casserole out and stick it in the oven.  Meal done in an hour. 

 
This comes out to $1.10 per serving with store bought canned soup, using the homemade soup will cut the cost.
 
These costs were figured buying the meat in the grocery store in bulk when it is on sale.  (I never buy meat full price) I usually buy my meat in bulk from the local meat packing place, when I buy it that way, these costs are even lower.  We usually buy half a cow or hog at a time.  I'm fortunate that the  local place buys from local farmers and while the meat is not necessarily organic, the local farmers tend to feed their animals less hormones etc.  They also allow me to rent a locker.  The locker rent is $15.00 a quarter, which I have yet to be billed for.  (We've been buying our meat there for at least 4 years) I calculate that an extra freezer would cost me more than $15.00 for three months for electricity. It makes it easy.  When I need meat I call and tell them what cuts I want from my locker and they have it bagged and ready for me when I get there to pick it up.  In addition, the meat is much leaner than what I find in the stores.  Even the ground beef is lean.  I usually have to put some sort of oil in the skillet to keep it from sticking to the skillet. I live in Indiana so prices will vary from one region to the next.


Sunday, February 2, 2014

Super Bowl Sunday Projects

This day didn't start out so good, I woke up with the same headache I went to bed with last night. Spent the better part of the day laying around and reading a book.  By late afternoon, I finally felt like doing something.  I have several projects that I have wanted to try and decided to start by convincing James to help me with making some refrigerator dough to make cinnamon rolls and various things this coming week. Then decided to make some Cool Ranch Doritos. I came across a recipe for them recently on this blog http://myfoodstoragecookbook.com/2012/03/24/homemade-cool-ranch-doritos/  I decided not to start with making my own corn tortillas, as my shoulder still doesn't like rolling out things with a rolling pin. I cheated and went to the Mexican grocery and bought a bag of 60 for $1.99.  While I'm sure I could have made them for less, the pain just wasn't worth it.  I also revised the recipe a bit as I didn't want to buy the white cheddar Mac N Cheese.  I considered my options and decided that the white cheddar popcorn topping would work. So here is my revised recipe.  I'd take a picture of the results and post, but unfortunately, they were eaten as fast as I could take them out of the oven and coat them.  I don't think they even had a chance to cool off. So, maybe they should be called warm ranch doritos. 

Here's my recipe:

Cool Ranch Doritos

I took a stack of tortillas not quite a third of the bag and sprayed the top of each with cooking spray and stacked them in a pile. I cut them into 6 pieces. I spread them on a cookie sheet and baked about 13 minutes in a 350 degree oven.  Watching for them to turn just slightly golden.  It's a fine line.  If you cook them too long they are overcooked, but if you don't wait until they are getting golden, then they will be a bit chewy in the middles. When they came out of the oven, I put them in a bowl and put more tortillas on the cookies sheet to bake.  That gave them about 5 minutes to cool a bit. I then sprayed the chips just slightly with cooking spray and put into a ziplock bag with about 2 tsp of seasoning mix. 

Seasoning Mix

4 tsp Ranch dressing mix
4 tsp white cheddar popcorn topping
1/2 tsp salt
1/2 tsp garlic salt
1 tsp onion powder

I shook them in the seasoning and poured back out into the bowl.  I just did one cookie sheet at a time and most of mine didn't even make it to the cool stage. Definitely a hit in our house.  The first batch I didn't spray with cooking spray before I coated them and they only had a very little of the seasoning stick.  Definitely worked better with a little cooking spray to help coat them. I didn't use all the seasoning mix, so I'll just store it for the next batch.

While I'm posting I'll put my mom's refrigerator roll dough here too.  This dough is awesome and it comes from  Better Homes and Gardens cookbook from the 1960s.  I put this together in my Kitchen Aid mixer with the dough hook.  It makes good rolls, or cinnamon rolls or just a loaf of bread.

Refrigerator Rolls

2 pkg. yeast
1 cup warm water
1 tsp sugar
2 c. milk scalded

2/3 cup shortening melted

¾ c. sugar

4 tsp salt

2 eggs beaten

10-11 c. flour

 Mix together 1st three ingredients and let set about 10 minutes and rise. Scald milk and add shortening, sugar and salt and eggs. Mix in flour until the dough has an elastic consistency and forms a ball. Let set for 10 minutes.  Punch down and place in refrigerator. Use to make rolls or loaves.  Can store in refrigerator up to a week.  When you use, shape into desired shape and place in pan. Let rise until double and bake at 350 for approximately 23-30 minutes, until golden brown on top.


Friday, January 24, 2014

Freezer Cooking Recipes

Here are the most recent recipes I have put into the freezer complete with a picture. My hubby loves Banquet fried chicken, he will settle for Aldi's brand fried chicken, but since our budget has been so drastically cut, he has to make do with mine. (Which he likes, but he hates for me to have to take the time to make it for him.) Today I put a batch of fried chicken in the freezer.  Here is my recipe.


Fried Chicken


1 cup Drake's breading mix
1 cup Flour
Salt and Pepper to taste
10 lb. bag of chicken leg quarters.

Preheat oven to 350. Cut the leg quarters into thighs and legs. Cut off any excess skin and fat and save for broth making. Mix together flour, Drake's and seasoning. Coat chicken with flour mix and fry in small amount of oil in skillet.  Fry until the skin is a little crispy and just starting to brown.  Place in a baking pan and put into oven. Try not to have edges touching. Bake in 350 oven for about 90 minutes, until chicken is golden brown. Remove from oven and cool.  Carefully remove from pan keeping skin intact and place on a cookie sheet.  Make sure edges are not touching.  Place cookie sheet into freezer and freeze overnight. Remove cookie chicken and put into a freezer ziplock bag. To eat, just place one or two pieces in the microwave and cook on high for 2-3 minutes, or place into  350 oven until warmed through.


Chicken Nuggets


1/4 cup Drake's breading mix
1/4 cup flour
Ok1/2 cup bread crumbs
Salt and Pepper to taste
1 egg beaten
4 chicken breasts

Cut chicken breast into nugget size pieces. Mix together Drake's, flour breadcrumbs and seasoning.  Put nugget pieces into egg, then coat with breadcrumb mixture. Fry in small amount of oil until chicken is cooked through and nuggets are golden brown.  Place on cookie sheet with edges not touching. Place cookie sheet in freezer and freeze.  Once frozen, put chicken nuggets into freezer ziplock bag. To eat, place number of chicken nuggets desired and microwave on high  or bake in oven on 350 until heated through.

Ok, so my picture taking leaves something to be desired, but these are the recipes of the day.  Hopefully, my photography will improve as I share more.


My Latest Project

I have taken on a new project.  While I have been going to the food pantries during the time I have been off work and trying to make ends meet on very little, I have thought about and/or noticed some things.  First I have noticed the types of people that come to the food pantries.  I have sat and talked with some of them while I waited to pick up food. I've met some people that I have talked to several times at the various pantries.  I have also heard what they have to say about the food stamp system and how the benefits have recently been cut.  I have seen first hand the items that you receive in these places.  While it is definitely helpful to get the additional food, it also is very lacking in the types of food that they give out if you are trying to piece together meals, solely from what you receive at the pantries.  There have been three pantries that we have gone to, and they give out different types of food at each of the three pantries.  There is a little overlap, but mostly, the concentration of food is different at each of the pantries.  I have also watched people use food stamps in the stores over the years. I frequently see these people purchasing mostly prepackaged or prepared foods that are more expensive and less healthy for them.  These observations lead me to believe that some of these people could benefit from classes that show them how to use their resources to make the healthiest and least expensive meals possible with the items they receive. 

Over the last couple of years, even prior to my accident, I have felt a calling to help feed the hungry people in our area.  I have thought about different avenues that could be used to do this and I have come to the conclusion, that offering classes that show people inexpensive ways to cook and/or use the items that are frequently given out at the food pantries is a good idea.  I thought about just doing classes about food, but over the last several months, I have started making most of my own cleaners, and many of the ingredients in those cleaners can be purchased using food stamps, which allows people to not only obtain food, but cleaning supplies as well from their food stamps.  To me this opens up an area that would help to save money for people that have very limited resources.  I am currently developing a plan to help teach people about bargain/coupon shopping, meal planning, inexpensive meals (including freezer cooking and crockpot cooking) and homemade cleaners.  I'm trying to develop a program, where we might provide the ingredients and people would be able to come and take from the class, a meal for their family, or cleaners to use in their home along with ideas about bargain shopping and coupon use.  If this idea takes off, over the next several months, I will be posting the recipes along with the cost breakdown of my recipes and hopefully, pictures of these recipes on my blog.  I will also update and post my meal plans and hopefully, I can give costs for each of the meals that I have on the menu.  While I usually purchase most of my meat through a meat packing company, I will also try and have costs if the meat were purchased in the store.  Of course, sale shopping will help reduce those costs. 

I'm hoping that by doing this, I can help others rather they are in my classes, or just following along online.  I think this is what God has called me to do, and it may be part of the reason that I am currently experiencing this situation.  Hopefully, I can use this to help other people that may be in this same type of situation.  Prior to this accident, I had no idea how or where to find help in our community.  Now I have a much better grasp of the assistance that is out there.  Hopefully, I can use some of this newfound knowledge to help others.